


I am a planner. Not my best quality, not my worst. I'm working harder to be a bit more spontaneous -- our summer road trip was proof of that -- but I will probably never be able to turn off the part of me that wants to make sure everything is in alignment.
I am also a visual person. I need to see plans in writing, physically see my to do list on paper, to make it make sense in my head. While I love technology, it is not always my friend in my plan making.
This physical need to visualize plans is what inspired this project. For nearly all of my adult life, I have had a physical calendar in my kitchen, planning out the months. Usually, I'd look for calendars that would add a bit of art to my space, or even let me dream of far-off places. You know, something that looks nice. Not too long ago, we "upgraded" to a dry-erase magnetic calendar for our fridge since wall space is a bit limited in my current kitchen.
O, my fridge. It was once the shame of my living spaces. EVERYTHING ended up on my refrigerator. Saved recipes. Little notes. Drawings from the nephews. Torn pages from magazines of things to remember. A mini dry-erase board for notes and meals. Magnets, magnets and magnets. Pictures. More magnets.

It was ridiculous. I should be ashamed to show it.
When we started on this kitchen face lift, I knew I had to do something with the fridge. I couldn't stand staring at that clutter anymore.
So, I decluttered & demagnetized, and while it looked so much better, I wanted a different solution for the calendar. Something that would plan out the month but also have a place for notes -- all those little reminders -- and a place to meal plan. A combo of the two dry-erase boards into one clean memo space. And something that would look nice.
Going off the Kraft paper planter idea, and the dry-erase board concept, my mind put together this guy:

It was fairly simple to create, but did require a bit of planning. Of course. ;)
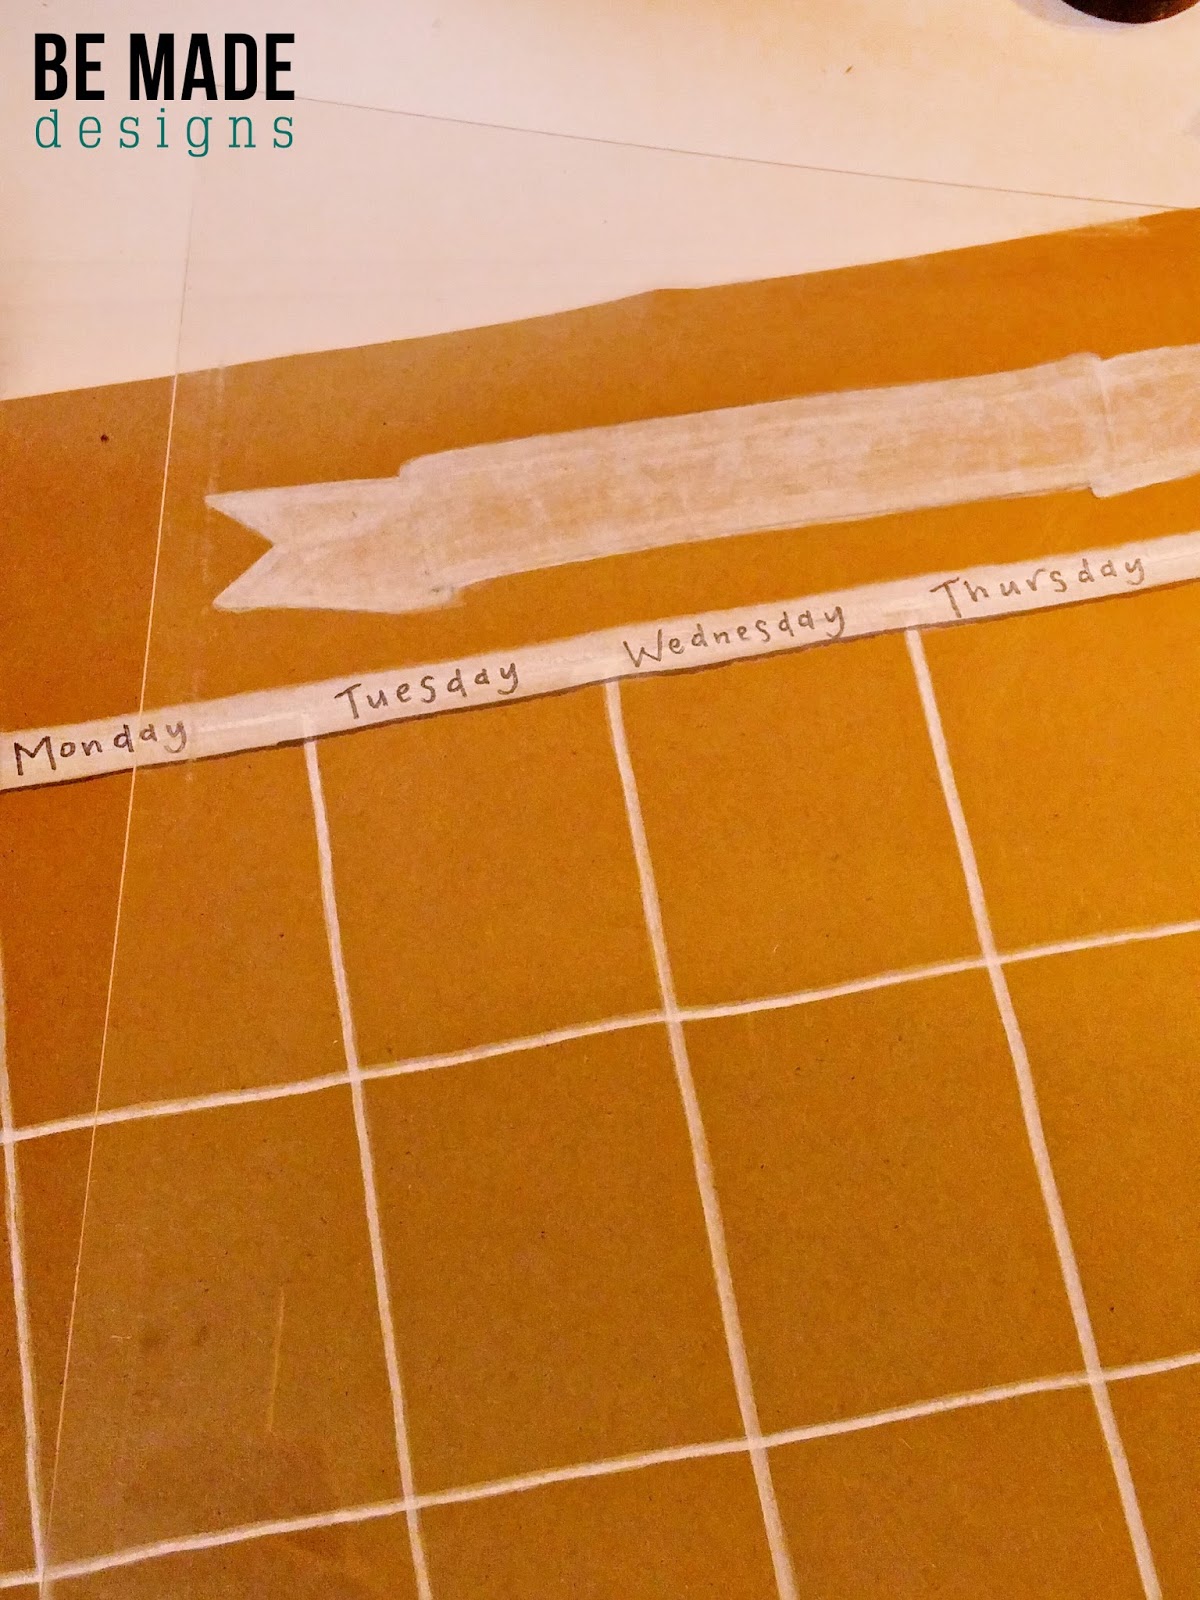
I first measured my freezer door to determine the size of my calendar, which for me, ended up being 18x24. I grabbed my roll of Kraft paper -- I had bought a roll of plain paper for this project, rather than the patterned paper I used on my Kraft planter -- and cut a piece to size. I then taped it square to my work surface so I could begin drawing out my boxes.


I then used grid paper to help me plan out my calendar and notes spaces. Once I got the layout I liked, I determined my measurements and transferred my grid plan to my Kraft paper in a very light pencil.

 |
| There are lines there, I swear! |
I used a chalk marker to outline all my pencil lines, and I ended up having to go over my lines a few times to get them as dark as I wanted. I also trimmed my side boxes with washi tape, just for a little extra somethin' somethin'.


Now, I just needed to call out what my boxes are for, and label my days of the week on my calendar. A gray marker did the trick.


Now, for the "dry-erase" part. I was in a "use what ya got" mode, and what I had was an old poster frame that was broken. Of course, I had kept it because I CAN'T THROW ANYTHING AWAY, and this project only justifies my hoarding tendencies, hahahaha! Not really! But, you know those frames I'm talking about? The cheapy ones you can get at Wally-World or even maybe Hobby Lobby. They have plastic frames and super thin plastic "glass". Well, I took the plastic "glass" and used a box cutter to cut it down to size: about a half inch or so larger than my Kraft paper.

Now for application! I taped the paper with washi tape to my freezer door, then used mini-magnets to hold the plastic on over it. I used the really strong kind of magnets -- like these -- just to be sure the plastic stuck, and would stay stuck.

 |
| Forgive the glare: my fridge is right across from the only window in my kitchen. No bueno for pics of shiny plastic. ;) |
Then, I filled in the blanks with the month's plans, and voila! The handiest calendar ever (for me)!

It's worked so well for us now for several months (as you can see I did this in March, and here we are in September!!), and the "dry-erase" is working super well. It looks great -- just how I had pictured -- and is so functional (my favorite part)!

As you can see, I didn't completely get rid of all the magnets. The hubby and I collect magnets when we take trips. It started inadvertently on our honeymoon and we've just kept at it since. So I just took washi tape and created "frames" to group all the different trips together, sort of as a scrapbook on our fridge. I labeled each trip with a mini-banner, and it looks so much better being organized! Now I have our summer trip to add to it from this year. I love when my nephews come over and play with the magnets, asking me about each one. I like getting to tell our stories. (:

Just another piece of the kitchen makeover. It's coming along!

The next kitchen project involves food. That's always a plus!!
T-T-f-N!

Enjoy this post? Then don't miss out on the others! (:
Follow along:
Or Click HERE to have these posts delivered right to your inbox!
LOVE this idea! It's awesome how you can customize it to fit your own needs. Definitely stealing this one!
ReplyDelete